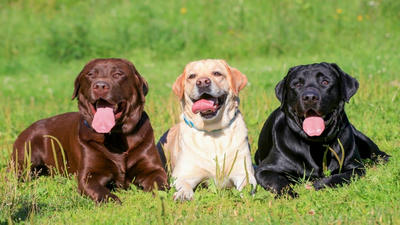
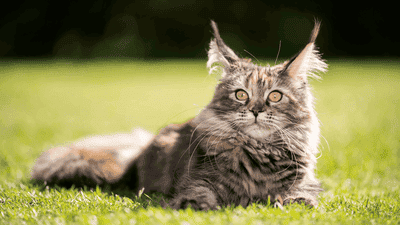
Pet photography is an art form that captures the unique personality and charm of our furry friends. While there are many elements that contribute to a great pet portrait, one of the most crucial factors is lighting. Natural lighting, in particular, can elevate your pet photography game, creating stunning, authentic images that stand out.
1. The Importance of Lighting in Pet Photography
Why Lighting Matters
Lighting plays a pivotal role in photography because it shapes the mood, tone, and overall quality of an image. In pet photography, good lighting brings out the textures of fur, highlights the pet’s eyes, and creates a natural, appealing look.
Natural Light vs. Artificial Light
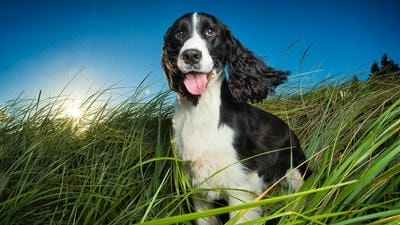
Natural light is often preferred in pet photography because it’s soft, flattering, and readily available. It reduces the need for bulky equipment and helps create a more relaxed atmosphere for the animal. Artificial light, while useful in certain situations, can be harsh and may cause pets to feel uncomfortable.
Challenges of Pet Photography
Pets are unpredictable and constantly on the move, which makes lighting even more critical. Proper lighting can help freeze motion, reduce blur, and capture sharp, detailed images.
2. Understanding Natural Light

The Basics of Natural Light
Natural light comes from the sun and changes throughout the day. It can be direct (bright sunlight) or indirect (cloudy or shaded environments). Understanding how to work with these variations is key to successful pet photography.
The Golden Hour
The golden hour occurs shortly after sunrise and before sunset when the light is soft, warm, and diffused. This is the ideal time for pet photography because it creates flattering shadows and adds a magical glow to your images.
The Blue Hour
The blue hour is the brief period before sunrise and after sunset when the sky takes on a cool, blue tone. This light can create a moody, ethereal effect in pet portraits.
Midday Light
Midday light is harsh and direct, creating strong shadows and overexposed areas. While challenging, it can still be used creatively with the right techniques.
3. How to Use Natural Light for Pet Portraits
Positioning Your Pet
- Front Lighting: Place your pet with the light source directly in front of them. This creates even lighting and minimizes shadows.
- Backlighting: Position your pet with the light source behind them. This creates a halo effect around their fur and can add a dramatic touch.
- Side Lighting: Place the light source to the side of your pet. This accentuates textures and adds depth to the image.
Using Shadows Creatively
Shadows can add dimension and interest to your pet portraits. Use them to frame your subject or create a sense of movement.
Working with Reflectors
Reflectors bounce light back onto your pet, filling in shadows and creating a balanced exposure. You can use a professional reflector or a simple white sheet or cardboard.
Avoiding Harsh Shadows
During midday or in direct sunlight, harsh shadows can be unflattering. Look for shaded areas or use a diffuser to soften the light.
4. Choosing the Right Location
Outdoors
Outdoor locations offer abundant natural light and a variety of backdrops. Choose spots with open shade, such as under a tree or near a building, to avoid harsh sunlight.
Indoors Near Windows
Indoor photography near a window can provide soft, diffused light. Position your pet close to the window and use sheer curtains to soften the light further.
Cloudy Days
Cloudy weather acts as a natural diffuser, creating soft, even lighting that’s perfect for pet portraits. Take advantage of overcast days for outdoor shoots.
Avoiding Distractions
Choose locations with minimal distractions to keep your pet focused and relaxed. A calm environment will make it easier to capture natural poses.
5. Camera Settings for Natural Light Pet Photography
ISO
Use a low ISO (100-400) in bright conditions to reduce noise. Increase the ISO in low-light situations, but be mindful of graininess.
Aperture
A wide aperture (low f-stop) creates a shallow depth of field, blurring the background and making your pet stand out. This is ideal for portraits.
Shutter Speed
Use a fast shutter speed (1/250 or higher) to freeze motion and capture sharp images of active pets.
White Balance
Set your white balance to auto or choose a preset (e.g., daylight or cloudy) to ensure accurate colors.
6. Tips for Working with Pets
Keep Them Comfortable
Make sure your pet is relaxed and happy during the shoot. Bring their favorite toys or treats to keep them engaged.
Be Patient
Pets are unpredictable, so be prepared to wait for the perfect moment. Use treats or toys to guide them into the desired pose.
Capture Their Personality
Focus on capturing your pet’s unique traits and expressions. Candid shots often reveal their true personality better than posed images.
Use Natural Poses
Avoid forcing your pet into unnatural positions. Let them move freely and capture their natural behavior.
7. Editing Natural Light Pet Portraits
Adjust Exposure
Use editing software to fine-tune the exposure and ensure your pet is well-lit without being overexposed.
Enhance Colors
Adjust the saturation and contrast to make the colors pop while keeping the image natural and realistic.
Remove Distractions
Use the clone or healing tool to remove any distracting elements in the background.
Sharpen Details
Sharpen the image slightly to bring out the textures of your pet’s fur and features.
8. Advanced Techniques for Natural Light Pet Photography
Silhouettes
Create silhouettes by placing your pet against a bright background and exposing for the light. This works best during sunrise or sunset.
Lens Flare
Capture lens flare by shooting directly into the sun. This can add a dreamy, artistic effect to your pet portraits.
Action Shots
Use natural light to freeze motion during outdoor activities like running or jumping. A high shutter speed and good timing are key.
Black and White
Convert your images to black and white to emphasize contrast and create timeless, dramatic portraits.
9. Common Mistakes and How to Avoid Them
Overexposure
Avoid overexposing your images by using a lower ISO, smaller aperture, or faster shutter speed. Check your camera’s histogram for accurate exposure.
Underexposure
Underexposed images can be fixed in post-processing, but it’s best to get the exposure right in-camera. Use reflectors or increase your ISO in low-light conditions.
Harsh Shadows
To avoid harsh shadows, shoot during the golden hour, use a diffuser, or position your pet in open shade.
Distracting Backgrounds
Choose simple, uncluttered backgrounds that keep the focus on your pet. Adjust your aperture to blur the background if necessary.
10. Building a Portfolio with Natural Light Pet Portraits
Showcase Variety
Include a mix of close-ups, action shots, and environmental portraits to demonstrate your versatility.
Highlight Emotion
Focus on images that convey emotion, such as joy, curiosity, or playfulness. These resonate deeply with viewers.
Tell a Story
Use your portfolio to tell a story about your pet’s personality, daily life, or special moments.
Keep It Consistent
Maintain a consistent style and quality throughout your portfolio. This helps establish your unique artistic voice.
Conclusion
Natural lighting is a powerful tool in pet photography, capable of transforming ordinary shots into extraordinary portraits. By understanding the nuances of light, mastering camera settings, and working thoughtfully with your furry subjects, you can create stunning images that capture the essence of your pet’s personality. Whether you’re a beginner or an experienced photographer, the tips and techniques in this guide will help you harness the magic of natural light and elevate your pet photography to new heights.
Related
-
Training and Behavior
-
Care and Health
-
-
Training and Behavior
-
Breed Profiles
-
Breed Profiles